DIY Aquarium Background…made in Singapore
DIY Aquarium Background…made in Singapore
By Irwin aka Sicklid
For the past two years of my fish keeping hobby, I have been greatly inspired time and again by the beautiful aquarium backgrounds that fellow aquarists around the world had made for their tanks. While there has always been the inkling to try it out myself, these thoughts never materialize into action, until I moved to a new place recently. The advantage of moving to a new place was that I get an empty place all to myself for three weeks to create my mess.
While working on this project, I checked out many sites. Not just on aquarium backgrounds, but also on related topics like sculpting styrofoams, curing cement etc.
Pictures of completed projects were simply invaluable as they gave me an idea of how I wanted my own backgrounds to be like. However sad to say, hard as I try I was not able to find any information of DIY aquarium background from locals. Either the ones who have done them did not bother to share or somehow local aquarists are just not as adventurous.
After much thought, I came to the following conclusions:
Why Singaporean Aquarists do not make their own aquarium backgrounds
a. Tanks do not come cheap. Any mistake may mean destroying the tank.
b. Lack of space to do the job. Trust me, it can be really messy. How many of us have the luxury of a workshop or garage where we can mess things up?
c. Availability of materials and equipment. When I first read on the net how some guys DIY their backgrounds, any thought of trying out myself fizzled out when I saw the list of items required to do the job.
d. Fear of killing the fishes. Have no idea what kind of toxic will be released into the water.
e. Not worth the hassle, simple Oyama background does the job well.
Here’s my list of materials, equipment. These were bought originally meant of a 4x2x2 tank and a 6x2.5x2.5 tank. However the idea for the latter was dropped subsequently.
a. 3 bags of black cement. - $3.00
b. Styrofoam. 2” thick, 4x2 and 6x3 - $30
c. Thin and sharp pen knife - $7
d. Acrylic non-toxic paint – 3 jars - $24
e. Paint brush / pail - $5
f. Wood carving knives - $7
g. Old Newspaper - Free
h. 3 tubes of Dow Corning Silicon sealant for glass and metal - Free
i. 3kg Salt
j. 10 litres of white vinegar.
Optional Items:
a. Hot air gun (butan gas) - $5
b. Long metal ruler - $3
c. Gloves - $2
d. Vacuum cleaner
e. Silicon Sealant gun.
f. Loose pieces of styrofoam in various shapes and sizes.


And here’s how I went about making my very first aquarium background.
a. Gathering of Materials and Equipment.
This part of the project proved to be one of the most daunting. References from the overseas websites could only serve as a guide as a number of the key items were not available here in Singapore. The main challenge was to determine what I could use as substitutes. Of course there was also the budget that I had wanted to keep within.
While common tools like pen knife, wood carving tool-set, gloves, paintbrushes, cement and pails do come rather easily in any hardware shop, some of the other key items were harder to find. For a start, I had a tough time trying to find the right size styrofoam boards. At first I could only find smaller 1” thick boards. In order to get them to the right size and depth, I spent the a whole afternoon, pasting these pieces (about 12 of them) together with silicon only to find that the final product looked rather flimsy. In the end, I had to scrape it and persisted in finding the right thickness and size. Finally found what I needed at Art-Friend, a art & craft shop down Bras Basar. However as one of the tank was 6ft by 2.5ft, I still wasn't able to transport the big piece of styrofoam back.
The other item that proved just as challenging was the paint that was to be mixed with the cement. The main concerns here were firstly making sure the paint was suitable for cement and secondly not-toxic to the tank’s subsequent inhabitants. Thirdly I have to find the right colour. The entire project was nearly scraped when I couldn’t find anyone who can tell me what kind of paint to use that was aquarium safe.
By sheer occurrence, I found this row of acrylic paint that read “Non-Toxic” and came with many colours and sizes at Spot Light (Plaza Singapura). More importantly at the fine print, it mentioned For CEMENT!
The silicon sealant was provided free of charge by the tank maker. With his experience, he was able to tell which were safe for tank use.
b. Design and Carving
Before any real work can be done, making sure that the measurements were right was very important because ultimately whatever piece of art created has to be nicely fitted into the background of the tank. Both my tanks come with a triangle overflow box at one side, which makes it harder. I thought long and hard whether to put a similar background on the overflow box and the sides of the tank to make it more complete. In the end, decided to keep it simple first as this was my first try.
Most sites recommended the use of a thin and sharp cutter. While I can’t disagree to that, I found the set of wood carving tools to be much more useful. With a single piece of styrofoam, I used a pencil to outline the shape of the rock structure. Using the pen knife and the word carving knife, I worked from the outline out. Digging, scrapping and cutting. Lots of styrofoam bits would fly all over. This was the time where the vacuum cleaner came in handy to keep the workplace tidy.
Once the “valleys” were created along the lines, sand paper was used to smoothen out the edges out and to create the shape of the boulders.


The hot air gun was particularly useful here to create the rocky effect. For the 4ft piece, not much hot air blowing was used, but when it was done on the 6ft piece, the effect was rather good.
Do keep this gun out of reach from children and when blowing onto the styrofoam, do it in a ventilated area. Burnt styrofoam emits nasty byproducts that are harmful when inhaled.
For the 6ft piece, I decided to try something different. Other than creating the “valleys”, I shaped pieces of loose styrofoam into smaller boulders, branches, etc and pasted them onto the main board with silicon. This helped to create varying depths to the whole structure. It took up more time and effort but the result was worth it.
c. Cementing and Painting
Now comes the fun part. Coating the board with cement was easy. Most of the articles that I read recommended three coats. As a typical “kiasu” Singaporean, I went with four. Reason for it was that I did not get the desired texture and colour even after the third coat. Hence the fourth was done.
The first coat was the trial layer to get a feel of the amount of cement, paint and water to be mixed. Typically the first coat should be thinner (less cement, more water). The cement paste got thicker with each new coat. I allowed the cement to dry for at least twelve hours between each coat. Hence the entire process took about two days to complete. PATIENCE IS KEY. Allowing the cement to dry naturally and misting the surface with a thin spray of water every 2 hours does help to ensure that the cement is strengthened. Some sites recommend mixing a little detergent as well, but I did not follow that.
To create a natural surface, while coating the board, it’s advisable to dab the paint brush unevenly over the surface rather than paint it. Varying the thickness of the cement over different areas also helped. The other trick I used was not to mix the paint too thoroughly. This will give a more uneven tone throughout the surface which looked more natural.

Actual 4 ft piece after the third coat. Do not be mistaken by the dark wet effect. The colour will lighten when it dries up. (see below)


6ft piece after 2nd coat.
d. Sticking of background to tank
Once the board dried up, I started to plan how to paste the board to the background of the tank. Unlike our western counterparts who have large spaces to do this, I was confined to the little area where the tank rested inside the cabinet. Ideally it would be best if the tank can be made to lie with the back of the tank resting on the floor. This way, the board can be pasted down and weight can be placed on top of the board until the silicon dried up.
However since my tank was already upright, inside the cabinet and I did not have any helpers, I had to do it the hard way. i.e. to pasted the board vertical. My first attempt failed miserably, so much so that I had silicon all messed up on the glass and I accidentally broke the board into half! I almost wanted to give up.
After some careful consideration and planning, I decided to try again. As the board had broken into two, I had to improvise. Breaking the board along the lines, I stacked the pieces together, creating more depth. Although the board now only covers half the back of the tank, I figured that could be easily compensated by placing rocks below.

Improved piece after the whole board was broken.
I used silicon to stack the pieces together and allowed it to dry for 24 hours, placing some weight on top. Once done, I was ready to try sticking the background to the back of the tank again.

Having learnt my lesson, I cut out a few pieces of loose styrofoam to act as horizontal beams to press the background against the back of the tank.


The board and the supporting beams were then left in the tank for 24 hours. This is to ensure that the silicon dries properly and that the board is firmly pasted onto the back of the tank.
e. Curing
The final step was to allow the cement to be cured. I filled the tank up with water, added 3kg of salt and left the pump to run. At the end of the first day, I took measurement of the pH. It was 11.2! I emptied the tank and refilled with tap water. This time, I added almost 10 litres of white vinegar. Salt and vinegar helps the cement to cure faster. After another day, the pH fell to 4.0 but rose steadily to 9.9 over the next two days.
I emptied the tank and refilled with water on the 4th day, 5th and 6th day. Slowly the pH started to stabilize. After one week, the pH remained at 8.8.

Once the pH started to stabilize, I added the coral sand and also setup the filter media within the sump. Adding the coral sand helped to increase and stablilize the pH further to 9.3.
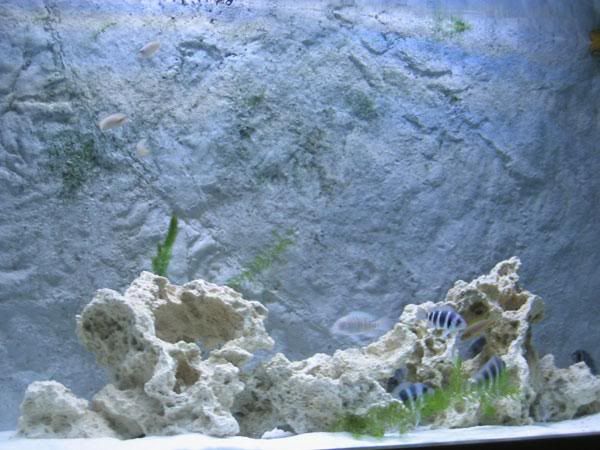
Finally after another 3 weeks of cycling, my main colony of 22 Tropheus sp.black Ikola were finally added in.


Overall, it was an enriching experience. Given more time and practice, I am sure much better backgrounds can be made at shorter time and with a lower budget.


4 Comments:
excellent explanation buddy
Nice descripton. But pictures are gone :(
Making a 3d aquarium background from polystyrene can be great fun, but have you tried making one using resin and fibreglass? It lasts much longer!
Thats really great, worth a effort!!!
Post a Comment
<< Home